Bkgd

Thursday, June 28, 2012

Happy Birthday Chaitali!!

Hello!

Today I want to wish my friend Chaitali a very HAPPY BIRTHDAY!  I sent this card to her and I hope she has received it by now.  

I got my inspiration in church from the VBS group. The invites were pencils with pinwheels on top.  Very fun and summery!  

Recipe:
Paper:  MME & Echo Park
Sentiment: Outside:  Stampin up, Inside:  American Art Stamps
Sketch:  Lets Scrap 5-1-11

So how did I make that pinwheel?  It was very simple.  I cut a 3 inch square out of double sided paper.  and folded the square in half to make a triangle going both directions.  So you have folds with 4 triangles.  I then cut most of the way up on every other fold.  Fold one side to make it look like a pinwheel.  After I did the folds, I put a cute little brad in the middle.


Chaitali's blog is on the left side.  Stop by and give her some birthday wishes!

Have a great day Chaitali!

Thank you for stopping by...
Athina

Thursday, June 21, 2012

Kissing Cousins!

Hello Friends!

Just a quick post tonight!  I have not had a lot of time to get work done in my craft room.  This is a page out of the book I made for my dad for Father's Day.  I took the pictures at my brothers wedding last October.  The two little girls are my nieces.  While we were taking picture of the brides and her bridesmaids, I zoomed in a bit and snapped a few of them sharing sweet kisses.

The background paper is by inque and the others are by MME.  For embellishments, I used a clear stamp to stamp the flourish, some white chipboard inked with Tim Holtz Peeled Paint Distress ink and finally a few butterflies cut out of my Storybook Cricut cartridge.  I used a layout by Audrey Yeager from Creative Keepsakes Mar/Apr 2012 as inspiration for this page.


I cut two of each butterfly and used a random stamp on each to emboss clear powder on them.  After I embossed them, I used Dusty Concord and Peeled Paint Distress ink on top of them.  The embossing powder created a resist to the ink.  I finished them of with some pop dots between the two layers and some pretty pearls.

I hope to be back with some cute cards very soon!  

Thank you for stopping by!
Blessings until next time...
Athina

Sunday, June 17, 2012

Chipboard Bookmark

Hello Blogging Friends!

I hope you are all enjoying Father's Day with the men in your life.  We celebrated Friday and Saturday night with our fathers, so I have today to play in my room and get a bit inky.

A while back I seen a tutorial on SCS for a Chipboard Bookmark by Beate.  It was beautiful, so I looked at the tutorial.  I used that as my inspiration for this bookmark.  I did not follow the tutorial real close and did some ad libbing of my own.

I used spellbinders, Floral Doily Motifs and cut out 4 cuts with kraft paper and 2 with Gina K 120# paper.  The Gina K paper is used on the front and back to sandwich the kraft paper.  After I cut them all out, I ran them thru my Xyron to adhere them to each other.  I stuck a white and a teal ribbon between the sandwiched kraft paper to create the pull no the bookmark.  The top piece of white Gina K was airbrushed with yellow copics.  I wanted a bright bookmark to go with the image I have choose.  I cut out a 3 inch circle and stamped the cute flower image, Lazy Susan Buggies by High Hopes.  I colored the image with copics and used a little bit of stickles on the bees wings.

After I colored the image, I used Distress Ink to color the background. Then I adhered the image to the top of the book mark and topped it off with a pink button tied with jute twine.


It was a very easy project with a cute result.  I think I will be making more of these soon. 

Thank you for stopping by.
Blessings until next time...
Athina

Thursday, June 14, 2012

Imagine!

Hello Friends!

I have a card for a very special man today!  Father's Day is this weekend and my husband requested a card for his dad.  He is so full of life and loves to buy old things that will someday look new again.  He just needs to find that time to make all those things new again.  Maybe in retirement, huh!

He has several tractors and a few cars that are pretty rusty.  He just loves to tinker with them.  So when my husband asked, I immediately thought of an old rusty tractor.  I found this Just Inked digital image.  My next step was to find some pictures of old tractors so I could see how they rust.  Mission accomplished!

I colored my image with copics and cut it out with a spellbinders labels 20 die.  I puts some post it notes in the sky for clouds and airbrushed blue for the sky.  I then removed the post it notes and airbrushed again with B000 to soften the clouds a bit.

The paper is by The Paper Studio, the old barn siding fits perfect with a tractor!  I distressed the edges to give it more of an old look.  The sentiment is stamped on chipboard with a Stampavive, Tina Wenke image.  The sprockets are by the man, Tim Holtz.  Yeap, hubby makes fun of me for my love of Tim. lol.

Can you Imagine the Possibilities for this tractor?


The inside caption I typed up on the computer.  Used the same spellbinders labels 20 as the front and added another sprocket.  The sentiment was printed on white cardstock and airbrushed with E33 to soften it a bit.

Copics used

I would like to enter this in the following challenges:
Trimmies Craft Challenge -Father's Day
Charisma Cardz -Male Cards
Crafting for all seasons - For Man
Fab 'n' Funky - Fathers' Day
Craft Your Passion - Anything Goes
Make It Monday - Anything Goes

Thanks for stopping by!
Wishing all those fathers a very happy father's day!
Blessings until next time...
Athina

Tuesday, June 12, 2012

Picture sorting for all those scrapbookers!

Good Evening Friends!

It has been a very busy few days cutting down trees and getting some things organized for the next few weekends!  But I did get some time to play in my craft room a little bit on Sunday.  We have a challenge over at our Pink Slipper Pajama Party blog group each month.  These ladies are so talented and I am pleased to be a part of their group!  

So Nancy is our June hostess.  Here challenge:

June’s challenge is to make some type of mini album/book.This does not have to be a scrapbook album. It can be a personal journal,calendar, inspiration book, diary, address book, coupon holder, an organizer.


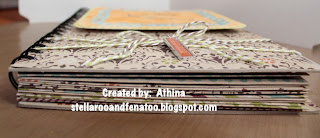
Well, this is right up my alley.  I love making altered books and things.  This is a 10" x 6.5" organizer made out of chipboard and printed craft paper.  The paper all coordinates, as I bought it in a pack together a few years ago.  I simply cut the chipboard cover to the size I wanted.  Then I used mod podge and glued the design paper on the top of the chipboard.   I then sanded the edges with my sanding block.

For the label on the front, I used the Cricut and cut out the label from the Lacy Labels cartridge.  It began as all white.  That is much easier than trying to match everything.  I then used my copics and my air compressor to color it how I wanted it.  I finished it off with some rub ons.  I added some dimension to the label by using dimensional glue dots.

I tied some jute twine around the bottom and used a charm that says "inspired".
Front


Edge

For the inside, I used a large rounded square cut from a cricut cartridge.  After I cut them out, I folded them like an envelope.  I did not fold over the top, as I wanted it to remain open.

Inside standing up

I used my bind it all to bind the book together.  I will use it to sort pictures for my scrapbooking when I travel.  That way I don't have to take a huge case of pictures, I can take only what I want.  I can also put in other mementos that go with the pictures.
Inside of book (outside of envelopes)

I did not decorate the inside envelopes, as I wanted them to remain flat for ease in packing for travel.
Envelopes open for pictures

I hope you enjoyed this little project.  I had fun making it and it was super simple.  Try one for yourself!  You can put all sorts of things in those envelopes!

Thank you for stopping by!
Blessings until next time....
Athina

Saturday, June 9, 2012

A Cozy Log Cabin!

Hello Friends!

I hope your day is fantastic!  We have a day full of family and friends planned for today and I can't wait! Several years ago, I went and purchased a sewing machine and thought I would make lots of quilts.  Well, I did a few but my interests changed over time.  The quilts I made were not large ones, but lap quilts or wall hangings.  I had done a few called a Log Cabin Pattern.  You can make the quilt blocks into different patterns to make a different quilt each time using the same block.  Very cool!

They make me think of a baby quilt when you use the soft colors.  So taking that inspiration from years ago, I figured out how to make a log cabin quilt block for the front of a card.  Yeap, it is out of paper and new stitches!


I cut strips of paper 1/2" wide and started with a 4 1/2" base (in yellow).  I put the strips down alternating sides.  When I was finished I had just a little 1/2" square for the middle.  Very easy!  I finished it off with a little yellow button on the outside.


The inside actually has a pocket which you will see in the last picture.  I did it with the same DP I used on the outside.  The only paper I know the brand of is the green plaid, it is MME.  The others came from my stash from many years ago and I have no idea.  The stamped sentiment is by Stampin Up.

Here is the little tag.  One of my blogging groups sent a member a tag for her new little bundle of joy.  I incorporated mine into the card before sending it to her.  


I hope you enjoyed it!  Thanks so much for stopping by!

Blessings until next time!
Athina

Tuesday, June 5, 2012

Crafty Gals June Challenge!

Welcome Back Blogging Friends!

Today, I have a challenge from the Crafty Gals Blogging Group over at SCS.  Our host this month is
Barb.

So our challenge this month....

Vacation!

Many of us will be taking a summer trip someplace, if even just for a weekend. So, your challenge is to create a card that shouts summer fun! Maybe a camping trip in the forest--or a trip to the ocean for a lighthouse tour or time on the beach--or a flight to another country to see the sights--or road trip to see local attractions--or biking along the rails to trails--or ....................... you get the idea. Shows us image that highlights a summer experience you have had or are planning to do in the future. Please include some patterned paper on your card--along with an additional embellishment or two........ If you want to share on your blog post a fun experience you have had on a vacation, that would be great! We all love to hear about trips--just not all of the hundreds of slides or photos.

After reading the challenge and thinking about it for a while, I decided that a card would not do for me.  So I did a scrapbook layout.  We are planning to go to Florida later this summer with my entire family, so I made a bright layout with flip flop paper for a beach theme.  

Recipe:
Paper:  Echo Park & Prima
Embellishments:  Ribbon, buttons, chipboard, Distress Ink, copics
Title:  My Minds Eye rub on
Sketch:  Let's Scrap 2-3-10


Left Side

Right Side

This one took quite a while to do , as I colored the flourishes and a few buttons with my copic air brush system.  The circles were all white and I inked them with distress ink, texturized some of them or inked with a background stamp.  Now all I need to do is to remember to turn my camera while snapping pictures.  I can officially say I have started my vacation scrapbook! What a great challenge Barb!


Please stop by and see the other wonderful creations from the Crafty Gals group.


Thanks for stopping by!   

Have a great day!
Until next time....
Athina

Saturday, June 2, 2012

Garden Time!

Hello in blog land!

I have been absent for a bit and I apologize.  It seems life gets in the way of having a little fun in the scrapping room.  Yesterday a very special lady, my MIL, had her last day of work before retirement.  She has worked 26 years in the school system and is very excited to take a break and relax. So I made her this little card to celebrate her special day.

Recipe:
Image: Sassy Cheryl's Farmer Sally
Ink:  Memento & Copics, Rusty Hinge & Scattered Straw Distress Ink
Paper:  Fancy Pants Designs & Cryogen
Embellishments:  Twine, buttons, lace, butterfly charm
Misc:  distress tool, copic airbrush, edge punch
Style:  Easel Card

I made this an easel card to give it a different flavor than I usually do.  Again I distressed the edges, I seem to be doing a lot of that lately.  But I felt it gave it a rugged farmer look.  The school colors were red and blue, so I used them as my color basis.  After I colored the image, I cut it out using a spellbinders die.  I wrapped the card in twine and used a cute little butterfly charm to top him off.

On the inside, I used matching papers to coordinate.  Put some buttons tied with twine to hold the card upright.  I choose the buttons because my MIL is a sewer, so they fit perfectly.  I finished her off with some lace and a Stampin Up sentiment.


A closer look at the image
I gave the clouds a try with my copic airbrush system.  I cut out little clouds out of a post it note and put them on the image.  I then airbrushed in blue around my digi image.  Once I removed the post it notes, I felt the white was too bright, so I used B0000 to go over the clouds to make them a bit softer.

Inside

Copics used

I would like to enter this card in the following challenges:
Raise the Bar - Hello Summer
Totally Papercraft - Folds, Folds and more Folds!
Wags n Whiskers - Summer Fun
Crafty Ribbons - Easel cards
Divas by Design - Anything goes


I hope you liked it and thank you for stopping by.
Blessings until next time!
Athina