
Good Evening Friends!
It has been a very busy few days cutting down trees and getting some things organized for the next few weekends! But I did get some time to play in my craft room a little bit on Sunday. We have a challenge over at our Pink Slipper Pajama Party blog group each month. These ladies are so talented and I am pleased to be a part of their group!
So Nancy is our June hostess. Here challenge:
June’s challenge is to make some type of mini album/book.This does not have to be a scrapbook album. It can be a personal journal,calendar, inspiration book, diary, address book, coupon holder, an organizer.
Well, this is right up my alley. I love making altered books and things. This is a 10" x 6.5" organizer made out of chipboard and printed craft paper. The paper all coordinates, as I bought it in a pack together a few years ago. I simply cut the chipboard cover to the size I wanted. Then I used mod podge and glued the design paper on the top of the chipboard. I then sanded the edges with my sanding block.
For the label on the front, I used the Cricut and cut out the label from the Lacy Labels cartridge. It began as all white. That is much easier than trying to match everything. I then used my copics and my air compressor to color it how I wanted it. I finished it off with some rub ons. I added some dimension to the label by using dimensional glue dots.
I tied some jute twine around the bottom and used a charm that says "inspired".

Front
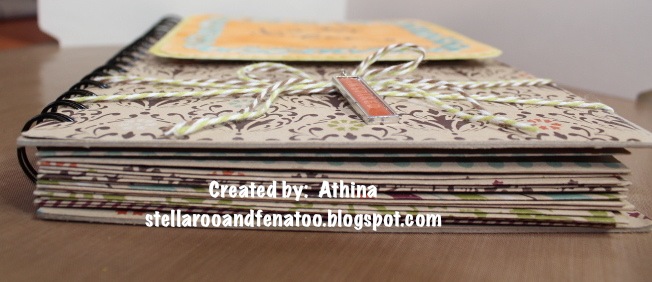
Edge
For the inside, I used a large rounded square cut from a cricut cartridge. After I cut them out, I folded them like an envelope. I did not fold over the top, as I wanted it to remain open.

Inside standing up
I used my bind it all to bind the book together. I will use it to sort pictures for my scrapbooking when I travel. That way I don't have to take a huge case of pictures, I can take only what I want. I can also put in other mementos that go with the pictures.

Inside of book (outside of envelopes)
I did not decorate the inside envelopes, as I wanted them to remain flat for ease in packing for travel.

Envelopes open for pictures
I hope you enjoyed this little project. I had fun making it and it was super simple. Try one for yourself! You can put all sorts of things in those envelopes!
Thank you for stopping by!
Blessings until next time....
Athina
Great job Athina. I love the papers you used on the inside and put together so well.
ReplyDeleteLOVE IT! What a clever idea and very useful!
ReplyDeleteThis is so cute! I love those pockets you made. This is a great organizer. Now I wish I had a binding tool!!
ReplyDeleteAWESOME job Athina!!!. This book is so GREAT!!!. Very well done!!!
ReplyDeleteAthina, this is pure genius! I love surrounding myself with pretty (as well as functional) things in my scrap area, and this is one idea that is definitely being "lifted." I just bought a Bind-It-All (still in the box), so timing is perfect for this project. Thanks for the inspiration!!
ReplyDeleteWhat a wonderful project! Love the coloring on the front and the papers you used throughout match so nicely. This would make a beautiful gift!
ReplyDeleteWhat a great book! I really like the shape of the envelopes with the flap left open. Your paper colors and designs are cool too!
ReplyDeleteWhat a fantastic project. Love it
ReplyDeleteShelby
Cute idea!!! I love it!
ReplyDelete